

Arched Doorway: A Step By Step Tutorial (if I can do it, you can too!)
- wyldsagedesigns
- Mar 22
- 5 min read
OKAY, so you’re ready to arch a doorway?? Let’s jump right in!!
STEP 1: Take your measurements!

A: Decide how high you want your arch to be! REMEMBER- leave an inch or two for the top of your cut out arch to be able to attach to any supports or framing, okay?
B: The width of your arch will be VERY important as the half of this measurement will be key in drawing your perfect arch shape (See step 3).
C: The depth measurement here is KEY. This is your total depth! So you’ll take this number and subtract the two pieces of drywall, the two pieces of plywood and the two pieces of corner beading. This equation will give you the measurement for the depth of the supports you’ll put INSIDE your arches, resulting in the perfect matching depth to your current doorway.

STEP 2: Cut drywall and Framing! (Note 1- if you don’t want it higher than your current doorway then skip this step. Note 2- make sure this isn’t a load bearing wall).
I used my multi tool with a drywall blade- similar items here-

STEP 3: Draw and Cut your arch frame.
For this, I used a 1/4 inch plywood board
You will want to start by cutting the width of this board to match the width of the doorway opening. As for the height, you’ll take the width measurement and cut it in half, but to this measurement, you’ll want to add the size of a 2x4 (1.5 inches) so the arch has something to attach to.

On the bottom edge, you’ll mark the half way point. Take any piece of string that doesn’t stretch and tie one end to a pen/market/pencil. At this point, you can hammer in a little nail on the bottom edge where you marked the halfway point to attach the other end of string or you can press firmly on it with your finger. The length of the string should be the half the length of the width. Then, starting in one of the bottom corners (keeping your marker as straight up and down as possible) run the marker up and around, keeping the string taut. You’ll be left with a perfect half circle!
Repeat on your other piece of plywood.
All that’s left is to cut!
Use this saw-

I had not yet cut the framing, but you will have!
AFTER you dry fit…
STEP 4: Attach your arches to your inner supports so you can attach to the doorway.
The depth of these supports will be-
Total existing depth – thickness of drywall(x2)– thickness of plywood(x2)– thickness of corner beading(x2)= Depth of internal support pieces
What this looked like for me…
5.25 – 1/2(2) – 1/4(2) – (3/16)(2)=3.375
I started by attaching just one arch to my 2x4 (which I ripped down to the width I needed from the above calculation (3.375) with my table saw.
centering it on your opening and then screwing into whatever framing or supports were left on your opening. Repeat on the sides.


Here’s my FAVORITE drill-
mine is the older version of this one.
STEP 5: Attach your “rays of sunshine” supports.
You can use any type of wood for this, as long as it’s the calculated depth and it’s big enough to screw in a drywall screw. I added about 10-12 pieces along the entire curved edge. To attach, I used a brad nailer. I had the ryobi one but it broke so I’ve been using this one with my air compressor. I recommend a cordless 18 gauge-

STEP 6: Drywall!
Cut your piece of drywall to the height and width of your arch. Attach with drywall screws. Then use your multitool with the drywall blade to cut along the arch.

***Something to note at this point- you should still be slightly smaller than your total depth of the original opening since your corner bead will add another 1/4 - 3/8 total.***
Score the back of your arch piece of drywall. I cut about every 1/2-3/4 inch using an exacto knife and a straight edge.

Attach to each ray of sunshine support starting in the middle and working down each side.

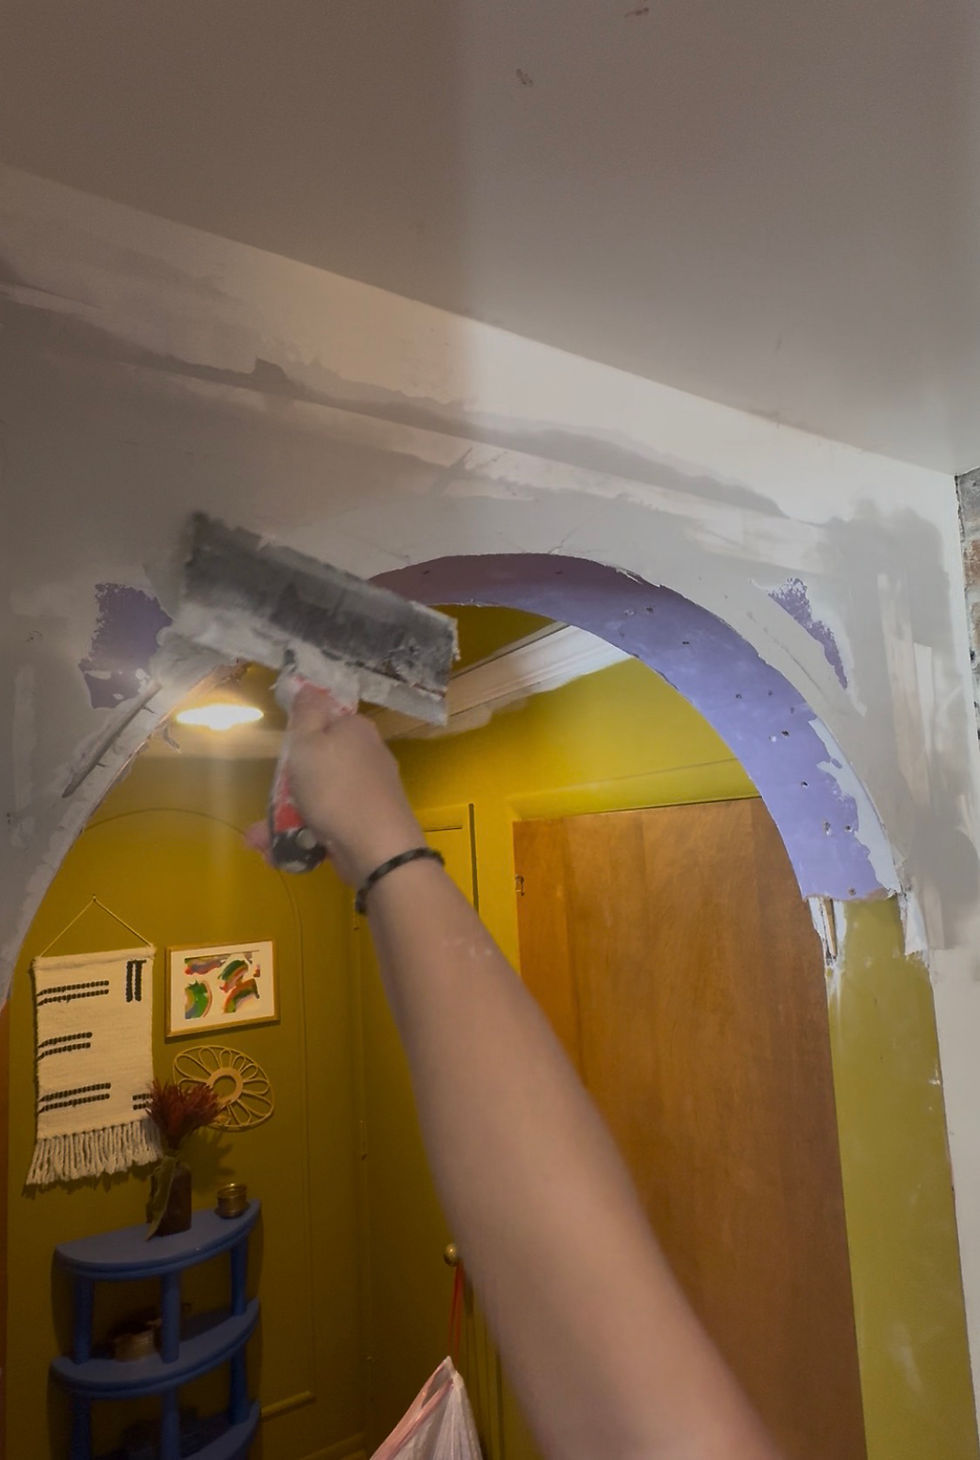
STEP 7: Mud+Sand+Mud+Sand
I won’t lie to you, finishing drywall is HARD. It’s very difficult to get your perfect smooth finish. With a few layers of mud, close attention to detail, and patience, I believe you can do it!
Generally speaking, you want to add mud to your seam first, then cover it with drywall tape, and then “squeegee” over that tape with your mudding knife.


And that’s all for your first layer!
The next layers, you’ll want to LIGHTLY sand any bumps, but not so much you scuff the tape. I had the MOST trouble with this when I first started because I wanted to sand it completely flat with each layer. You have to build it up a teeny bit and then feather edges to meet with the wall.
***A more detailed drywall tutorial coming to my blog soon!!***
This was my first time drywalling something curved. FIRST, dry fit your piece of corner bead and cut to size. Make sure it’s long enough to reach the bottom of the drywall pieces ( you maybe have to trim angles on the corners to create a seamless transition from curve to straight. start the same way as before by adding a layer of mud on both edges to act as the “glue”.

Place your corner bead and start nailing in the holes every few inches, being sure it’s pushed tightly on the corner.


Corner bead-
Here’s where things got trickier.
I’m not sure if this is the right way to bridge the gap between existing wall and new arch, but I just used a drywall patch and did a lot of layers of mud to reinforce it.

LOOKED ROUGH AT THIS POINT. I had MUCH anxiety.
BUT, I let it dry, sanded, dry, sanded, dry, sanded. It turned out pretty good!
As for the corner, after it dried, I applied a thin layer of mud and did the same thing (dry, sanded, mud, dry, sand), increasing the size of my drywall knife on the last layer.

Drywall-
Drywall screws-
Drywall mud (joint compound)-
Drywall tape-
Drywall knife set-
Sanding tools-
Don’t have this but I may NEED IT!!!
OKAY, PHEW. Sanding done.
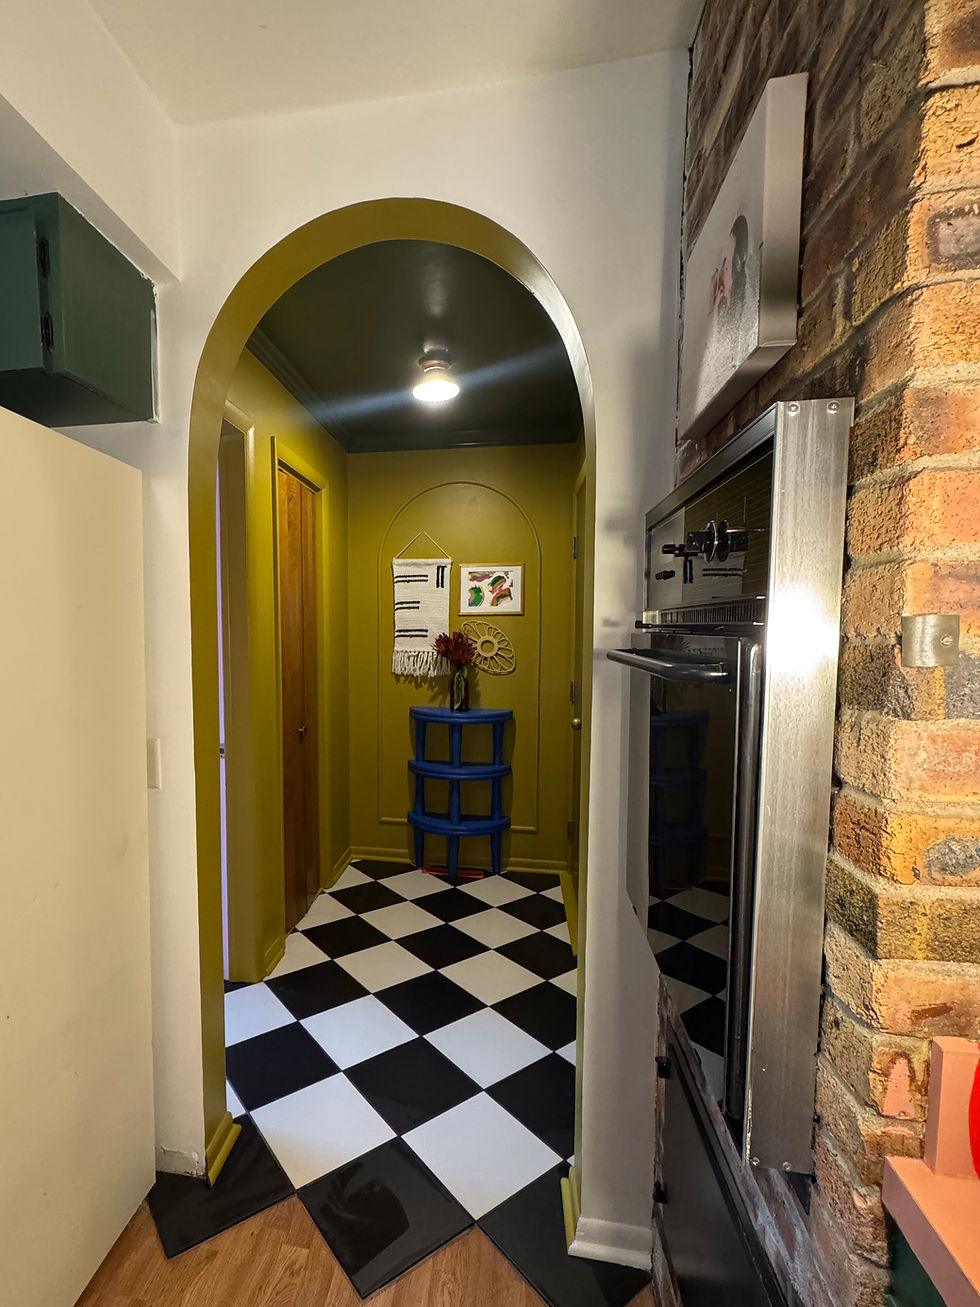
STEP 8: PRIME AND PAINT!
STEP 9: Admire your beautiful arch and pinch yourself because you won’t believe how much this elevates your space.

THANKS FOR BEING HERE! YOU GOT THIS!!


Comments